Whether or not you have any previous artistic experience, you can learn to create your own unique wood burned masterpieces. I’m a firm believer that anyone can start this hobby and with a little practice become a truly great artist. Pyrography is a great art form to get involved with because it has a low cost startup and has endless possibilities. I’m going to cover the art of wood burning briefly in this section just to give you an overview of what it’s all about. If you would like to learn more then please visit our more advanced and in-depth topics in the sidebar.
So what is all the fuss about? Burning wood can’t possibly be art right? Well we assure you that it is and in fact it’s a very old art form that dates back to the 1600’s. It’s not just wood either – many people who are into pyrography work with mediums like leather or gourds.
Find Your Wood
For the time being we will focus on just the wood. After all, there are plenty of different types and styles of wood to choose from with different colors, textures, figures, and grain patterns. Most of us started out practicing on anything we could find. One thing we do recommend is staying away from pressure treated materials (green colored wood used for outdoor decks and railings). Pressure treated wood contains chemicals that may be harmful to burn. Once you are more experienced you might find that you like basswood, oak, cedar, or another choice but for now let’s not worry about it too much. What’s more important is collecting all of the tools you need to get started and a piece of wood is one of those tools! Find some wood that is natural – for more information on this check out our post about the Safety and Health Concerns With Pyrography.
Other Pyrography Tools
So now that you have your scrap wood, what’s next?! Well there’s a few more things you will need to get started. There are a thousand different wood burning tools that exist but we have reviewed and picked out the best ones for beginners. If you don’t already have a wood burning tool handy we recommend you checking out some of our reviews to help you make a well informed choice! Additionally you will also need some sandpaper, a sanding block (a small scrap piece of wood will do), a clean working space, and some safety tools like a dust mask, fan, and gloves if you choose to use them. After you have all of your tools together it’s time to get started on the very basics.
Beginner Wood Burning Techniquies

Practice!
After you get your hands on a wood burning tool let’s get out that scrap wood that you collected earlier. Don’t worry too much about trying to draw the next Mona Lisa right away – let’s work on some of the basics! We suggest reading up on the instruction manual of your device and making yourself familiar with how all of the settings and features work. Be extra careful not to touch the hot tip to your skin or to leave it in contact with any surface for extended periods of time! After your tool is plugged in and heated up try dragging it across your board lightly.
Consistency in Your Marks
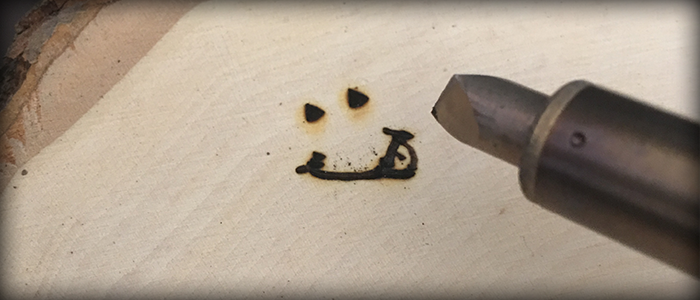
Experiment around with the pressure that you place on the tip and notice that the heavier you press the darker lines you will achieve. Try creating a few light dots in a row and then a few dark dots. Pay attention to how long you keep the tip in contact with the wood and the effect this has on your dots. Try several lines or dots in a row concentrating on consistency. See if you are able to keep the lines light when you want them light and dark when you want them dark. With more practice you will learn that there are many different factors that determine how light or dark your marks are. The main 3 that you should focus on for now are pressure, speed, and heat. The more pressure the darker your lines or shading will be. The slower you drag your wood burning tool across the wood the longer it will be in contact with each area and therefore the darker the mark. The hotter your tool is the faster and darker the wood will burn. One thing to take notice of is that your tip will cool off as you drag it along the canvas so you might notice a dark burnt spot at the beginning of your line and then lighter portions near the end of it as your tip cools off.
Rotation!
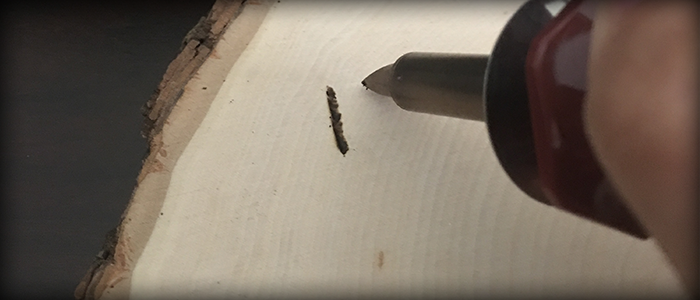
If you have a tip that is not symmetrical try rotating it and see what differences you can find. Experiment with rotating the tip of your tool to draw with the edge or just the point. See how this effects your drawing. Try a few zig-zags as well as some curved lines. Again experiment with how rotating the tip will change these lines and how the pressure will control darkness. Again, don’t worry if you make mistakes – that is all part of the learning process! Also make note of how the grain in the wood may impact how quickly the wood burns. This is something you will want to keep in mind when it comes to burning your final design. We recommend doodling on a spare piece of wood that is the same type as your final piece of work will be on. This will allow you to get a feel for the wood and how quickly it burns, how the grain acts, etc. Try experimenting around with your tool and adjusting the temperature of the tip (if your model is adjustable) and see how this impacts your lines.
Wood Burning Designs
Transferring Your Design
Even if you are not a great freehand drawer many wood burners choose to follow stencils for at least the hard outlines of their drawings. After transferring the stencil to your choice of wood it becomes a lot easier to burn the image accurately and precisely. You can find a variety stencils online or you may choose to print your own on carbon paper, graphite paper, or something similar. We recommend taping your image to the wood on one corner so that you can lift the image if you wish to see the transfer. Then it’s as easy as going over the lines you want transferred with a pencil. We suggest using smooth stokes with your pencil in place of the traditional sketching technique to help the stencil mark neatly on the wood. It is not necessary to trace out 100% of the lines but we recommend covering the major outlines at least. The shading and minor details can be freehanded while referencing the original drawing. Clean up any stray lines on the wood with some sandpaper or your eraser. While you are at it touch up any of the outlines that may have been messed up or missed when using the stencil.
Sanding
Sandpaper will become your best friend! It’s usually a good idea to sand your wood before you begin transferring your design. Give it a good sanding with a high grit sandpaper that will remove imperfections and leave the canvas smooth. Working with a rough piece of wood is no fun as it catches your pyrography tip and doesn’t always allow for smooth lines. You will want your final product to be smooth to the touch and it is a lot better to do the sanding beforehand. If you choose to do it after your burning is done the sanding will remove some of the finer details of your work. This can also be a good thing because if you make a small light mistake with your pen or wood burning tool just give the area a light sanding. The sandpaper is now your eraser, don’t be afraid to use it! In most cases we recommend using a sanding block to ensure all areas are sanded evenly. We wouldn’t want an uneven surface or a dip in the middle of your artwork. Wrap your sandpaper around a small block of wood to ensure this doesn’t happen.

Changing the Tip of Your Pyrography Iron
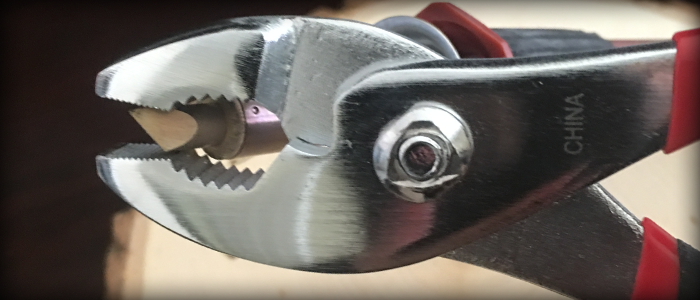
A word of advice when you decide to experiment around with any additional tips you may have for your wood burner – allow it to cool off and then use a pair of pliers. Not allowing the tip to sufficiently cool off can leave you with a couple of problems. First off, where do you put it? Don’t be like me and absentmindedly set it on the table only to see smoke a few seconds later. Also it can be bad for the threads on the tip to be changed out while hot. Sometimes it can be damaging enough that it will mess up the threads and render the tip useless and we don’t want that happening! Turn off your tool completely or unplug it and wait a sufficient amount of time for it to cool down. Carefully loosen the tip and replace it with the new one that you want to use. Remember – Lefty loosey, righty tighty! If you are looking at the tip of your iron you will need to rotate it to the left or counter-clockwise to loosen it. Likewise when it comes time to tighten the new tip you will need to turn it right or clockwise. Make sure the tip is tightened snugly but don’t over tighten it.
Keep Practicing!
We hope that this guide has walked you through the first steps to become a great pyrographer. Just like other art forms, wood burning takes a lot of practice to build up your skills. It is a very rewarding hobby to get into and we hope we have encouraged you to grab some wood and begin! Have fun and stay safe!